Saturday, March 15, 2014

5 Minute Recycled Toddler Pants Tutorial

Eh-llo Peeps!

If you haven't yet seen my tips for recycling and sewing kids clothes, you should check that out.

Today, as promised, you're getting a peek into my method of sewing toddler pants. In the beginning, I followed a pattern with moderate success and got locked into that singular mindset of how to construct a pair of pants. Turns out, there are lots of different ways and by letting go of that method and trying some others, I landed on one that's easier and I use most often for kids pants.
Moral of the story: don't be afraid to try new stuff! :-P

Anyhoo...

First, I grab a pair of pants (in this case leggings, because that's what I'm making) that I know fit my tot well to use as a pattern. I've measured and made paper patterns for Donna before, but she's changing sizes so often now, I've found it's easier to just nab something that I know fits and cut around it.

Fold your material in half, one fold for each leg, paying attention to were the stretch is (red arrow) because these are leggings and they're going to be fitted. I'm using blue and grey for each leg so you can clearly see my two folded layers. Fold your pants (pattern) in half and line up the outside length of the leg on the folded edges.
 
Cut around the pants eyeballing a guesstimated seam allowance. Don't be super picky here. If I'm making something amazing (haha), I'll pin and measure my seam allowance, maybe mark it out with chalk, yaddi, yaddi, ya. For kids clothes, it's snip, snip, snip!

Make sure you leave 2-3 inches (depending on the width of the elastic you're using) at the top of the pants for folding down the waistline. (If you're short on fabric and can't swing that, you can always add a waistband later, but it's more time consuming.) Also note that for this one, I enlarged the legging pants pattern (again by eyeballing) because these are jeans and needed to be roomier.
 

Fold open, right sides together,  and sew along the red lines.

Put the legs right sides together and sew up the red line.

Inside out and try on (note the extra tall waist at this point).
Fits good!

Measure a piece of elastic. It should be slightly stretched without causing any discomfort.

Sew elastic into a closed loop.

Fit them into the top of the waist so that the material just overlaps the elastic by a seam allowance. 
Stretch the elastic to fit and stick four pins in.

Zig zag (for stretch) around.

Fold the elastic down into the pants twice so it is completely hidden and run around with a straight stitch. Remember to quick add a tag in the back before sewing this closed!

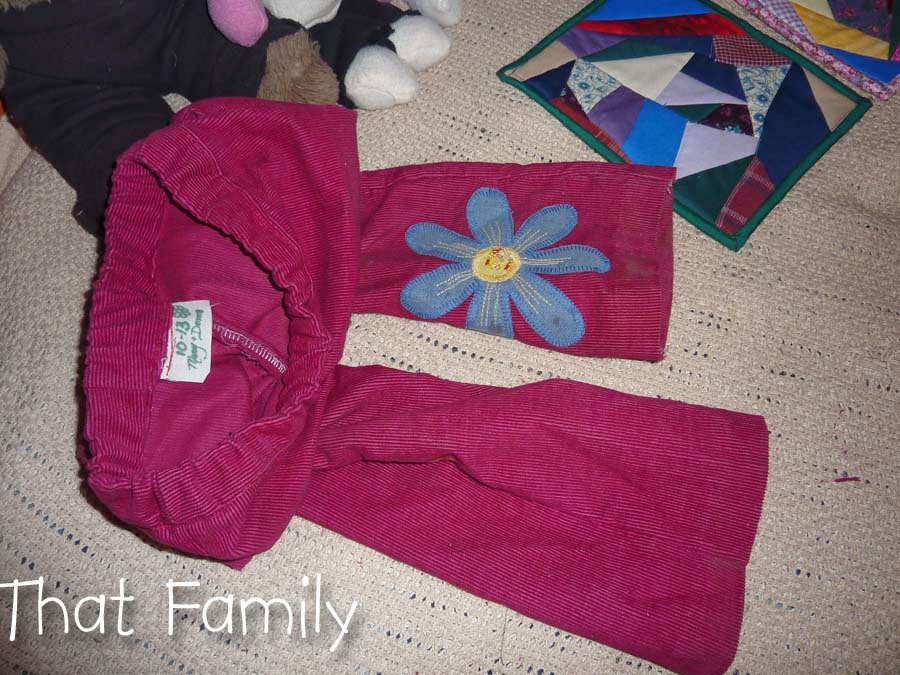
I do a boring double folded hem on the bottom of the leggings, and done!! 
Now look at your clock for me. If it was more than 5 minutes, I apologize. I actually never timed this (muahaha!). But it feels about that long to me. ;)

A word about recycling toddlers jeans from adult jeans....
Your pattern is going to be quite low on the pants in order to avoid the back pockets and still have a tall waist line to fold down. This means that you won't have a perfectly straight edge to line your pattern against because it will be flaring for our womanly hips right about there...

 ..making an extra wide waist area. I ignore this and proceed as usual to the fitting stage.

 Here I can guesstimate how much needs to be taken off those edges. Looks like an inch or so taken in on both hip seams should do it.

Much better.
 

 Finish it off...

 And whalla!

That's all for now! Hope this is a confidence booster for anyone starting out. I'll be back shortly with my 8 minute (or so--who knows!) shirt tutorial. :o)


 Also, I still have to get around to sharing our windowsill aquaponics system with you all. Don't worry--I haven't forgotten! :)

 Photobucket

Friday, March 14, 2014

Tips and Tricks on Recycling and Sewing Clothes for Youngsters

 Hey Everybody!

 Since it looks like this outside today:

 I decided to continue work on my pile of unwanted clothes to be recycled. Since this is something I've been doing quite a bit of this winter, I decided to snap some pics while I worked and share a few tricks I've learned on this seemingly never ending chore. 


If you have ever attempted to make your own clothes, you may have been (as I was) discouraged by a few things:
Firstly, that new fabric is typically more expensive than most second hand clothes.
Secondly, reading and rereading a pattern, re-oiling, re-threading and re-reading your sewing machine manual, careful measuring and cutting and etc. etc. is all very time consuming.
Also, it seems like homemade clothes wear through faster than anything purchased. Or maybe we just cringe more at the stains and holes?
Finally, kids, teens especially, and--let's just admit it--all of us, want to look stylish. :) Who wants to go out in something obviously recycled and homemade looking?

Obviously, these pitfalls haven't prevented me from sewing clothes, but I'll share some of my tips in a minute...

For his birthday last week, I made Johnny a new hoodie. Would you guess that this was pieced together with scraps and unwanted shirts? Or that the general construction took only an hour?
 

 Mostly, however, I make Donna clothes, as it is easier to recycle down into small clothes than larger sizes. I like to mix and match sleeves and fussy cut for designs on the front of shirts.


 Necklines are one of my biggest pet peeves for a number of reasons: They're difficult to make look perfect and store bought, they're difficult to fit and they're difficult to do quickly without patterns or fussiness. I still struggle with necklines, but we're getting along better nowadays...


 So, here's some of my tips on recycling and sewing clothes for your family...

  • Frugality and simplicity don't get along... at all. Don't keep everything in your goodwill bag for recycling. I can't stress this enough. Don't keep the ugly colors, the unnatural materials, the dingy, worn, or pilly, and the pocket covered or otherwise small pieces that you wouldn't get too much fabric from. Consider why you're getting rid of it and if it has anything (even remotely) to do with the material, just get rid of it. In the beginning, I kept way too much, thinking I could use the partially stained clothing for rag rugs or fussy cut the clean areas for quilts... in short: "ain't nobody got time for dat!!"
  •  Same thing goes for buttons and zippers. Only keep the dazzlingly shiny, 100% best ones.
  • Use your child's best fitting clothes for patterns, and then make them a tiny tad bigger (if you can) particularly in pant length. 
  • When inventing your own patterns, knits are your friends. Pay attention to your stretch when laying out your pattern for comfortable and easy fitting. With enough stretch, anything fits!
  • As much as possible, I try to cut to reuse existing hemlines on sleeves and shirt bottoms for two reasons: one because it looks more 'store bought', and two, because I don't particularly like hemming...
  • Always double sew or zig zag your seams on kiddos clothes. Trust me, this is a short cut I always try and always regret when I end up resewing popped seams. If I had a serger I would use that.
  • Save especially stretchy (ribbed knit) pieces, if the stretch is still good, for collars and cuffs.  
  • A lack of fabric rarely stops me. Don't be afraid to mix and match colors and try things if you don't have enough of one color. The kids love it and for play cloths, who cares! I might dig for something more uniform if we go out however... ;)

(Notice how I compensated for too narrow sleeves on the shirt by adding a strip of fabric, as well as a extra length of pink on the bottom. And, oh, those leggings...yeah.)

  •  Learn what needs to be pinned and what doesn't. This is a huge time saver! I never pin hems or side seams (straightaways), but just a few pins save loads of time on the rounded neckline and shoulder seams when you're at the machine.
  • Taking measurements and writing them into patterns may be a good idea for you, but when sewing for a kid (who's sizes seem to change week to week) it's much faster to have them nearby to try on your work in progress. For shirts, I usually try on necklines before finishing the rest of the shirt, and pants get a try on before the elastic and hems.

  •  Tummy measurements (for elastic) can be the hardest one to accurately get on a child. When I say "breathe normally now" the stomach is sure to suddenly bloat or suck in drastically. I've learned you're better off asking the child to say something while you quickly nab their normal belly size. Add an approx. inch for seam allowance and snip.

  • New elastic can be quite pricey, which is a bummer if your objective is to not spend money on your kiddo clothes. I actually get mine for .10 from the thrift store. It's new but leftover smaller pieces which are usually perfect for Donna sized bellies!
  • Wide elastic (as I have here) can be cut in half lengthwise and used for two pairs of pants.
  •  When you're cutting, cut! If I have a pattern I'm confident with, I'll go ahead and cut stacks of material. Try to use up your whole bag of 'clothes to be recycled' (I never have, but I always try!). The other night, I cut pieces for four shirts. The next day I sewed them up in minutes.
  •  A good pair of scissors is a worthwhile luxury in your frugal lifestyle. I mean it. I'll put up with a lot of stuff: small scraps of fabric, single colored thread and even an occasional bent pin, but I never regret the splurge of good scissors. Oh, and some fun music while you work is good too, almost as good as good scissors, but not quite... 
  •  Kids clothes are easier to fit because they have no shape. Because of this, it's hard to discern front and back without a tag (I know, you would have thought the flower on front would've been a giveaway) but you wouldn't believe the lectures I've gotten when I've overlooked this detail. Tags to a toddler who takes great pride in dressing herself properly, is a really big deal. Also, not hard to include if you think of it at the right time. I like to date my tags but sometimes Donna will just color them instead...
  •  Homemade clothes DO wear faster but don't be discouraged, I've come to realize that this is mainly because they're worn so much more often than the others. Donna's wardrobe is about half and half homemade and purchased clothes, but it seems like my clothes get a lot more abuse (read: 'wear').
  • It might take longer to add a decoration, but your sibling or child will adore you forever if you do... or for the two days that it takes to make the garment unrecognizably dirty. But still. And don't be surprised when, after impressing yourself with the flower you appliqued, your sibling or child will request a teddy bear holding a balloon and riding a pony with flowers and a sun on the next shirt you make for her. :-P


In summary, making your own toddler clothes can be virtually free and only require a minimal amount of time after a bit of practice. Oh, and a word about practice... don't forget that these are just play clothes you're making. If they don't fit awesomely or have puckers, remember: they're only being made to be stained, ripped and outgrown faster then you can snip the threads on them. That's why it's so worth it to practice AND save money on these clothes!


I hope this post was inspiring, if not even helpful, to you. I have here some quickie tutorials on my methods for recycled kids pants and recycled kids shirts.


Be inspired! :)
Photobucket

Thursday, March 6, 2014

Winter Pics

Hey Peeps!

 Long time, no words written here.... Like, what happened to Feb? Not that I'm complaining---one month less of winter would be fine by me!

Anyhoo, here's a bit of a picture dump, as much to prove that that last month actually did exist as to share with those of you who don't follow 'this family' on facebook.


 Horse back riding still happens in the winter when the conditions are right (no ice on the roads).

This picture reminds me that I have to shear my three little sheep soon (hopefully!) Can't believe how big she's gotten.

This is the time of year when the goats roam freely, as their fences sink to knee high and lower under the snow despite our efforts to shovel moats around them. It's usually okay, since there are no gardens for them to wreck, but feeling annoyed at the defiant principle of it, Mike ran some hot wire around the top of their pen yesterday and they're still inside today. We'll see if that lasts...

 These two girls are Lizzy's life. She spends far more time with them than us. ;)

This winter's most noteworthy difference has been a family pass we got for snowboarding on the Porkie slopes twenty minutes away.
  
It's been a fun afternoon get away to fight the cabin fever.


My little minions and I... we have some good fun together. :-)


We participated in the SnowBurst Fest in Feb, which included called dancing and fireworks.

We had a baby horse born in Feb, too. 
His conception was the result of a broken fence last year--not planned.
 
 Science lesson. :)

 All cleaned up and cute...

 His name is Guster.


 Farm chores are more challenging in the winter... you never know what new obstacles you might have to face. We just had two holey water tanks due to busting out the ice. Seems like there's always something...

Don't have to worry about the hairy Icelandic ponies getting cold.

Donna's learning how to ride.

Carding up some squishy sock yarn for Mom to spin. That fiber has already been made into socks. I'm actually running low just now and looking forward to my new crop of fleece!

A homemade cabbage shredder enabled us to put the rest of our cabbage from the cellar into kraut. 

Being whopped by the 5yr old in chess ;) (no actually, teaching her how to play--but she's gotten good!).

Kitten in the apple tree.

 No denying, this has been a winter of discovery. We've had lots of wonderful family discussions as we struggle to plan for our futures--both this year with the coming spring and future life goals in general--and while no hardcore answers have been solidified, I feel like we're on the brink.

Sort of like spring, you know, you can tell it's getting closer despite the never ending cold and snow. I feel hopeful.


That's it for now. I'll be sure to share as soon as we have all the answers figured out! (*sarcastic laughter*) ;) Actually, next up I wanted to share about Mom's aquaponics system. It's had several bugs, but as of right now, we have eight quickly growing fish in a tank in our windowsill and seedlings started above them. More on that later... maybe.

Happy spring!
Photobucket